Agilent Technologies N9010A Scanning Receiver
The Agilent Technologies N9010A Scanning Receiver device driver is a Spectrum Analyser which is supported by RadiMation®.
Configuration[edit]
The following tabs are available in the advanced configuration of the Agilent Technologies N9010A Scanning Receiver:
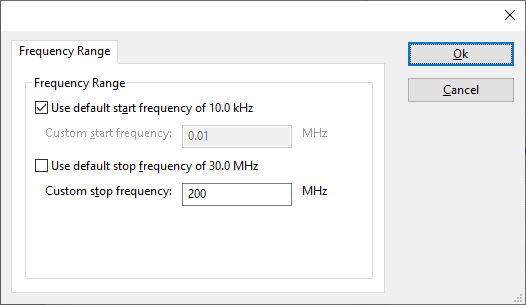
The frequency range of the Agilent Technologies N9010A Scanning Receiver as provided by the manufacturer is shown and selected as default. It is possible to overrule these frequencies and to manually adjust the allowed frequency range of the Agilent Technologies N9010A Scanning Receiver.
| If the checkbox is checked, the default start frequency will be used as the lowest usable frequency in a test for this device. |
| If the Use default start frequency checkbox is unchecked, another start frequency (expressed in MHz) can be specified. The customized start frequency will then be used as the lowest usable frequency in a test for this device. The customized frequency can be a limitation or an extension of the default start frequency. |
| If the checkbox is checked, the default stop frequency will be used as the highest usable frequency in a test for this device. |
| If the Use default stop frequency checkbox is unchecked, another stop frequency (expressed in MHz) can be specified. The customized stop frequency will then be used as the highest usable frequency in a test for this device. The customized frequency can be a limitation or an extension of the default stop frequency. |
Specifying a different frequency range can be useful if for example:
- A device (like a coupler, antenna, injection device, cable, etc...) is still usable (but out of specification) outside the standard suggested frequency range.
- An external mixer is used to measure an extended frequency range.
- An up- or down-convertor is used to shift the frequency range.
- A newer model of a device is present that has an extended frequency range, and still uses the same remote control commands.
Be careful changing these settings as RadiMation® is no longer able to verify if the Agilent Technologies N9010A Scanning Receiver is used outside frequency range that is specified by the manufacturer. This may result in serious damage to your measurement device.
| Warning: | At least firmware version A.12.09 should be installed on the Agilent Technologies N9010A Scanning Receiver, otherwise the preamplifier cannot be controlled correctly in EMI receiver mode. |
Alignment[edit]
The Keysight Technologies N9000-series Spectrum Analysers have to be aligned, to ensure the performance and accuracy of the N9000-series. Changes in ambient temperature, internal temperature and time intervals can trigger that a new alignment is required. When the N9000-series analyser thus indicates that it should be aligned, it is better for the performance and accuracy to perform that alignment. That is why our RadiMation® device driver for the N9000-series detects this situation and the informs the end-user that an alignment should be performed.
The alignment process can take some time, and there are several types of alignments possible. We therefor advise to the end-user that the alignment is performed manually. The alignment is thus NOT started automatically from our RadiMation® device driver. The RadiMation® device driver for the N9000-series analyser is checking if the analyser is correctly aligned before it is used during a measurement. If an alignment is needed the error 'Device is not aligned. Please align device and restart the measurement' is raised. An alignment should be performed manually before it can be used during a measurement. Once the alignment has been performed manually, the measurement can be started in RadiMation® again.
The N9000-series analysers have an option to perform the alignment automatically when it detects that an alignment is needed. It is however undesired to perform the alignment during the actual test, as this cause a period of time that no measurements can be performed, and it causes differences in the amplitude measurement within the same test, before and after the alignment. To prevent that the alignment happens automatically during the actual emission test, the RadiMation® device driver for the N9000-series analyser uses the following steps:
- A check is done to determine if an alignment is needed on the instrument. If this is the case, the error 'Device is not aligned. Please align device and restart the measurement' is raised.
- The auto alignment is disabled
- The actual emission measurement is performed
- At the end of the measurement when the used equipment is being deinitialised, the automatic alignment is activated again.
External mixer[edit]
If option EXM is present in the Agilent Technologies N9010A Scanning Receiver, it is possible to connect and use an external mixer to the Agilent Technologies N9010A Scanning Receiver. The mixer has to be connected to the 'IF Input/1s LO Output' port of the Agilent Technologies N9010A Scanning Receiver, and desired configuration and use of the mixer can be activated and configured on the display of the Agilent Technologies N9010A Scanning Receiver itself. Also see chapter 6.2.13 of the Keysight X-series Signal Analyzers manual for the details on how this should be configured on the Agilent Technologies N9010A Scanning Receiver. Depending on the desired use case, it could help to also activate the 'Signal ID' function and use the 'Image Suppress' setting as the 'Signal ID Mode', to suppress signal images.
When RadiMation is controlling the Agilent Technologies N9010A Scanning Receiver, the analyser is preset, however the configuration of the external mixer input will remain selected. Thus manually configuring the external mixer on the Agilent Technologies N9010A Scanning Receiver before RadiMation is started, will also allow RadiMation to use the mixer. The only change in the configuration of RadiMation that is needed, is to modify the frequency range of the device driver to match the actually measured frequency range. This can be done on Frequency range tab of the advanced configuration dialog.
If for example the 'Keysight USB-M1971E-001 V-Band' mixer is connected, the Start frequency and Stop frequency of the device driver should be modified to respectively 50 GHz and 75 GHz. Of course also the used antenna should be matching with the to be measured frequency range. In the TSF, the actually measured frequency range (50 GHz - 75 GHz) can be configured, and this will control the Agilent Technologies N9010A Scanning Receiver to perform the correct measurement.
'Advanced' configuration[edit]
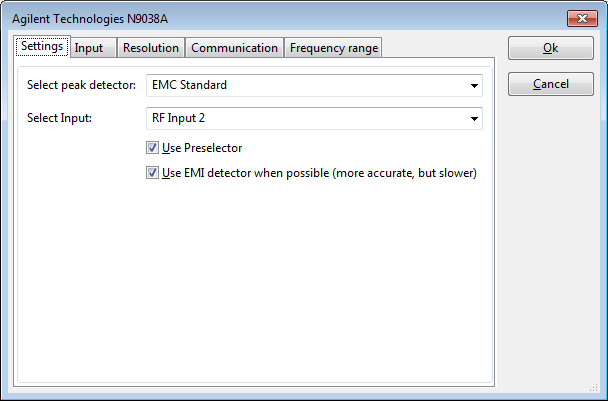
The 'Advanced' configuration dialog of the Agilent Technologies N9010A Scanning Receiver device driver has several tabs to configure the device driver.
Settings[edit]
| Specifies the standard that should be used for the peak detector. Possible standards are: 'EMC Standard' or 'MIL Standard'. |
| Specifies the input that should be used. Depending the exact model used, it is possible that the selection of the input is disabled. |
| If the preselector should be enabled or not. |
| Specifies if the EMI average or non-EMI average detector should be used. The EMI average detector is more accurate, but also slower than the non-EMI average detector. Depending on the available options in the measurement device it is possible to select the EMI average detector. When this option is activated and the EMI average detector is available, the EMI average detector will be selected. Otherwise the non-EMI average detector will be selected. |
Input[edit]
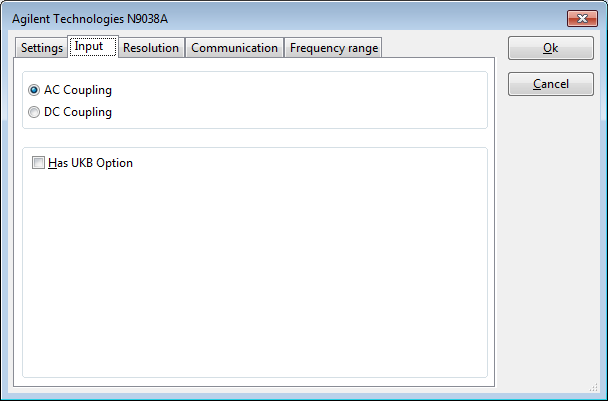
| Specifies that AC coupling of the input should be selected. |
| Specifies that DC coupling of the input should be selected. |
| Specifies if the UKB option is present in the device, which will allow to perform measurements on a lower frequency range. |
The scan resolution of the Agilent Technologies N9010A Scanning Receiver can be selected. The scan resolution is the number of points that will be present in a single sweep of the analyzer.
| Specify the number of points that should be used by the Agilent Technologies N9010A Scanning Receiver for a sweep. It may be possible to select a known value from the dropdown list. |
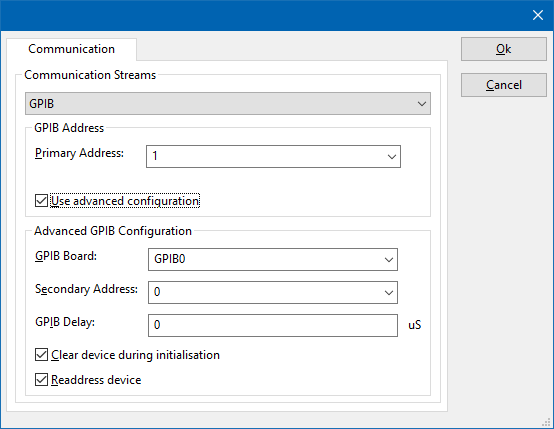
On the Communication tab, the desired communication method can be selected and configured. Depending on the selected method, additional relevant settings are shown and can be configured.
| Selects the medium or method that should be used to communicate with the device. Depending on the capabilities of the device this can be one or more of:
Depending on the selected communication stream, additional configuration parameters can be configured. See the Communication Settings in Chapter 15, on how to configure each of these communication streams. |


