Rohde & Schwarz Preset configuration
The R&S Analysers preset function in combination with RadiMation[edit]
Introduction[edit]
When RadiMation is used together with a Rohde & Schwarz analyser it is good to be aware of the preset function of the analyser.
The preset function will set the analyser up for measurement according to a default set of settings. When an analyser is originally delivered there is a default set of settings which will be selected when the device is preset.
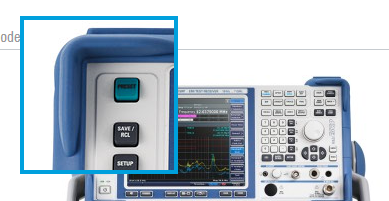
The device can be preset by pressing the ‘Preset’ button (see the picture below). 
Below are is a partial list of the default set of settings for an ESRP analyzer (These lists can be found in the end-user manual of device. Be aware that this is a partial example and not the complete list.)

When the ‘Preset’ button is pressed, this default set of settings is selected in the analyser. The initial configuration is selected such that the RF input is always protected against overload, provided that the applied signal levels are in the allowed range for the instrument.
Remote control of a R&S analyser via RadiMation[edit]
When a test is started, RadiMation also calls the preset function every time. This is the base configuration for the device. RadiMation is doing this at the start of every test, and thus selects the default set of settings for every test.
If manual tests with the analyser should be performed, it is advised to first press the ‘Preset’ button to also load the default set of settings again.
How to change the set of settings that should be used after a preset[edit]
On the R&S analysers it is possible to select if the default set or a customized set of setting should be loaded during the preset. Normally the default set of settings is loaded when the ‘Preset’ button is pressed. If a customized set of settings should be loaded, the relevant settings should be changed, and that customized set of settings should be saved to a file.
Creating a file with a customized set of settings[edit]
The easiest way to make a customized set of settings is to load the default one and make changes to it and then save it. That saved file can then later be selected in the preset configuration.
The following steps will show an example on how to create a saved file with a customized set of settings
- Load the standard preset by pressing the ‘Preset’ button.
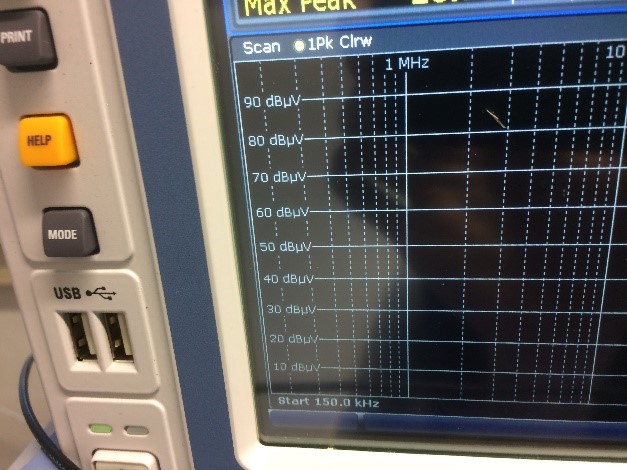
- Change a setting, for example the ‘Grid min level’.
- On this analyser its value is by default set to 0 dBuV and this is now loaded as the selected value because the ‘Preset’ button was just pressed
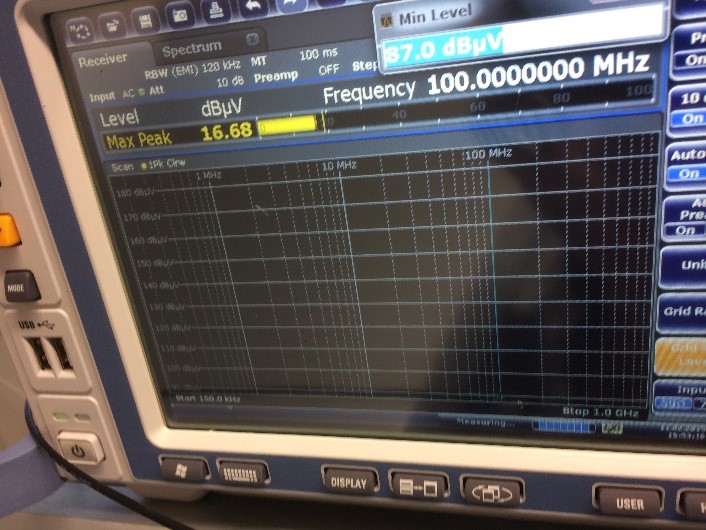
- In the customized set of settings we would like to show the grid from 87 dBuV, so a value of 87 dBuV can be selected for the ‘Grid min level’.
- . When all the desired settings are set to the customized values, press the ‘Save / Rcl’ button and save the file.

Give the file a suitable name.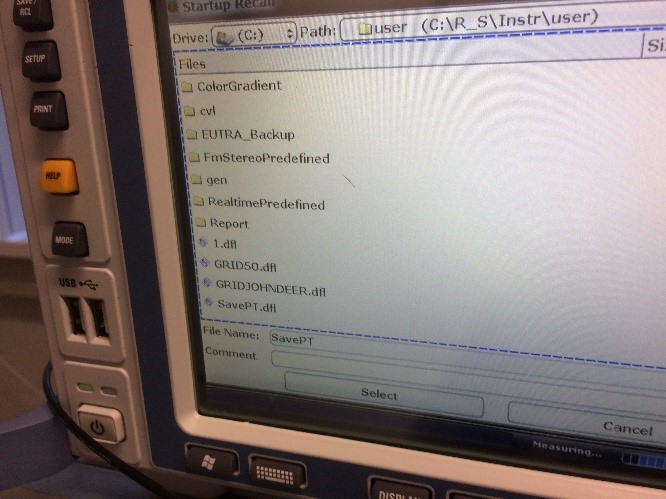


Now a saved file with the customized set of settings (in this example with the ‘Grid min level’ set to 87 dBuV) is available.
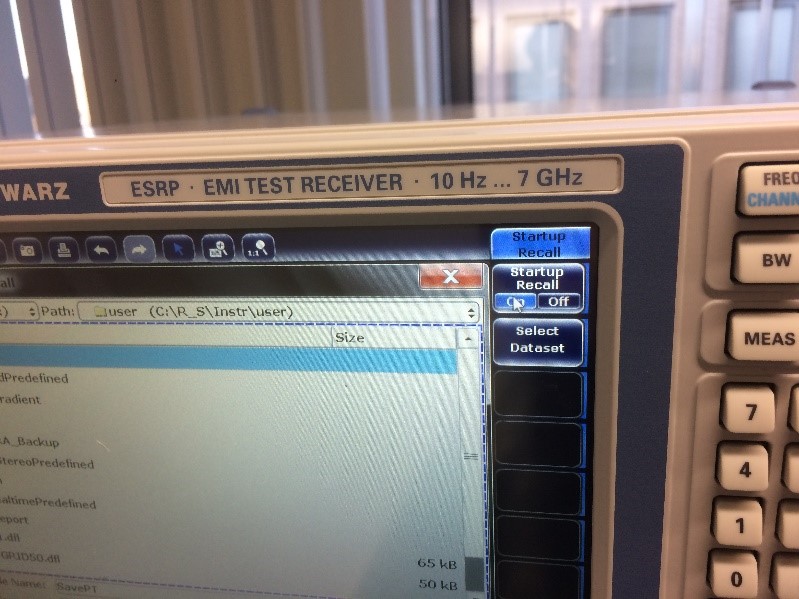
Turn ‘startup recall’ on or off[edit]
The set of settings that will be loaded when the ‘Preset’ button is pressed, can be selected in the ‘Save / Rcl’ menu.![]()
The ‘Save/Rcl’ menu contains a ‘file’ menu. In the ‘file’ menu a ‘Startup Recall’ button is available.
When ‘Startup recall’ is ‘off’ the default set of settings will be loaded (from the table that was already shown above).
When ‘Startup recall’ is ‘on’, a saved file with a customized set of settings will be loaded. To select that saved file, click on ‘Select Dataset’ and then select the name of the file that was already saved.
When the saved file is selected, it will be loaded when the ‘Preset’ button is pressed or when the measurement is started via RadiMation.
Load a customized set of settings on preset[edit]
Now that the customized set of settings are saved to a file, that file can be selected when a preset is performed. In this example the preset value for the ‘Grid min level’ has been changed 87 dBuV.
- Press ‘Save / Rcl’.
- Change ‘Startup Recall’ to ‘on’.
- . Press the ‘Select Dataset’ button.
- . Select the file that has been saved in the step “Creating a file with a customized set of settings”.

Now the previously saved file with the customized set of setttings will be loaded on a preset. This means that when the ‘Preset’ button gets pressed or a measurement is started, the settings are loaded that have been saved to the file.
In this example the ‘Grid min level’ was modified. In the earlier picture it was shown to be on 0 dBuV (which is also the default value in the default set of settings for this analyser). When the ‘Preset’ button is now pressed, the analyzer will be initialized with a ‘Grid min level’ of 87 dBuV, as can be seen in the picture below. This modified preset, is now correctly loaded, and will now also be used when RadiMation starts a test. 