RadiSenseDeviceDriverConfiguration: Difference between revisions
No edit summary |
No edit summary |
||
| Line 1: | Line 1: | ||
<noinclude>{{Note|This page is used to show the configuration of the [[Raditeq]] RadiSense device drivers. This page can now easily be embedded on all relevant device driver pages.}}</noinclude> | <noinclude>{{Note|This page is used to show the configuration of the [[Raditeq]] RadiSense device drivers. This page can now easily be embedded on all relevant device driver pages.}}</noinclude> | ||
{{:DeviceDriverCommunicationTab}} | {{:DeviceDriverCommunicationTab}} | ||
{{:DeviceDriverIdentificationTab}} | {{:DeviceDriverIdentificationTab}} | ||
{{:DeviceDriverRadiCentreTab}} | {{:DeviceDriverRadiCentreTab}} | ||
Revision as of 10:28, 14 May 2024
| Note: | This page is used to show the configuration of the Raditeq RadiSense device drivers. This page can now easily be embedded on all relevant device driver pages. |
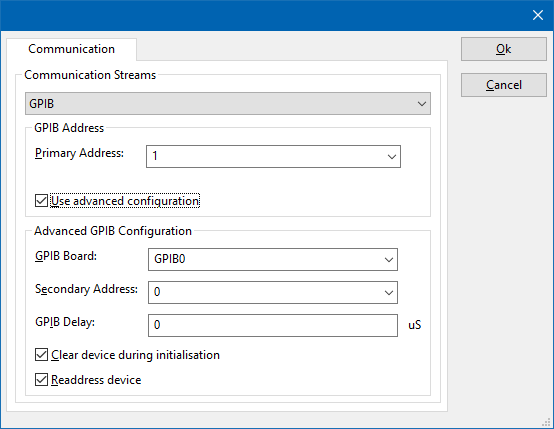
On the Communication tab, the desired communication method can be selected and configured. Depending on the selected method, additional relevant settings are shown and can be configured.
| Selects the medium or method that should be used to communicate with the device. Depending on the capabilities of the device this can be one or more of:
Depending on the selected communication stream, additional configuration parameters can be configured. See the Communication Settings in Chapter 15, on how to configure each of these communication streams. |
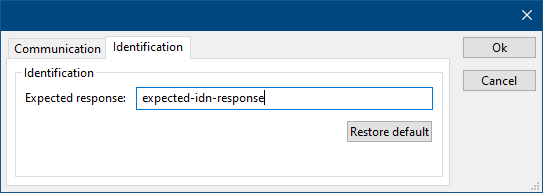
On the Identification tab, the expected *IDN? response of the test and measurement device can be configured. It is used to determine if the correct test and measurement device is connected.
| The expected *IDN? response of a device. It can be changed in the case the commands are the same for another device for which no RadiMation® driver is available yet. |
| Restores the original Exepected response. |
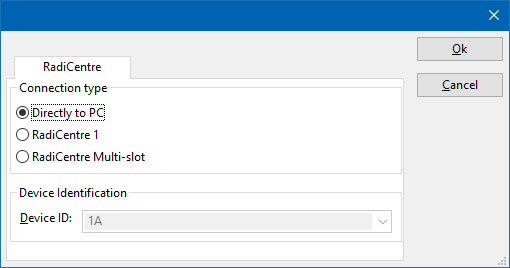
There are several methods in which the RadiSenseDeviceDriverConfiguration can be connected to the PC. The RadiSenseDeviceDriverConfiguration can for example be connected directly to the PC, or through a plugincard in a RadiCentre 1 or a multi-slot RadiCentre. More information on how to use the RadiCentre is present in the product manual of the RadiCentre. The settings on the RadiCentre tab can be used to specify how the RadiSenseDeviceDriverConfiguration is connected.
When the RadiSenseDeviceDriverConfiguration is connected to a multi-slot RadiCentre, also the slot number in which the plugincard is fitted, should be specified.
| Specifies that the RadiSenseDeviceDriverConfiguration is connected directly to the PC, without the use of a RadiCentre. |
| Specifies that the RadiSenseDeviceDriverConfiguration is connected to a plugincard that is fitted in a RadiCentre 1. |
| Specifies that the RadiSenseDeviceDriverConfiguration is connected to a plugincard that is fitted in a multi-slot RadiCentre that also can be manually controlled using the display on the front of the RadiCentre. The slot number in which the plugin card is mounted can also be selected. |
| Specifies that the RadiSenseDeviceDriverConfiguration is connected to a plugincard that is fitted in a multi-slot RadiCentre Ultra. This RadiCentre Ultra has no display, and can only be used when remote controlled. |
The settings on this RadiCentre tab, only specifies if and which RadiCentre is used. The communication settings on the Communication tab specify the connection settings to communication with the measurement device.
The configuration on the Communication tab should be configured depending on the outgoing connection from the PC. Thus if Directly to PC is selected, the communication settings should be configured as what is actually used between the PC and the RadiSenseDeviceDriverConfiguration itself. If RadiCentre 1, RadiCentre multi-slot or RadiCentre multi-slot Ultra is selected, the communication settings should be configured as what is actually used between the PC and the RadiCentre. In the configuration where a RadiPower is connected with USB to a multi-slot RadiCentre, which is connected by GPIB to the PC, the communication settings of the RadiPower device driver should thus be GPIB.
If the RadiSenseDeviceDriverConfiguration is for example connected to slot 3 of a multi-slot RadiCentre which has IP address 192.168.178.95 and is connected by LAN to the PC, the following settings should be configured in the device driver of the RadiSenseDeviceDriverConfiguration:
- RadiCentre tab
- Connection type: RadiCentre multi-slot, using as slot number: 3
- Communication tab
- Communication Stream: VISA
- LAN: 192.168.178.95
DeviceDriverRadiCentreDeviceSoftwareUpdateTab
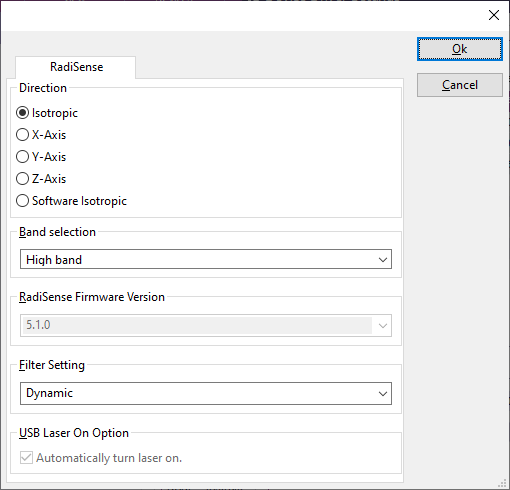
The RadiSense tab can be used to configure the specific settings of the RadiSenseDeviceDriverConfiguration.
| If the field strength of a specific single axis or an isotropic value should be measured. |
| Allows if the Low frequency band, High frequency band, or both frequency bands should be used for the electrical field strength measurement. |
| Allows to select the firmware version that is present in the RadiSense probe. This information is used to used version specific commands to control the RadiSense and which baudrate to use for serial communication (version 4.6.0 and below use 9k6, versions above 4.6.0 use 19k2). |
| The filter that should be used during the measurements. |
| If this option is checked, the driver will automatically activate the laser when the device is being used. |


