Helix ALM: Difference between revisions
Jump to navigation
Jump to search
No edit summary |
No edit summary |
||
| Line 14: | Line 14: | ||
[[Image:TestTrackStudioLogIn.jpg]] | [[Image:TestTrackStudioLogIn.jpg]] | ||
== Adding a customer == | |||
The following steps can be used to add a new customer to the list of known customers in TestTrack | |||
# Start TestTrack | |||
# Show the list of customers (menu: View > Customers) | |||
# Press the 'Add...' button | |||
# Specify the company name in the 'Last Name:' field | |||
# Select the 'Address' tab | |||
# Specify the company name in the 'Company:' field | |||
# Any additional field can also be specified on the 'Address' tab | |||
# Press the 'Close' button, ensuring that the data will be saved (click 'yes') | |||
# Show the list of security groups (menu: View > Security Groups) | |||
# Open the security group that corresponds to the reseller of the customer, by double-clicking the group in the list. | |||
# Ensure that the options 'Display Customers' and 'Display local' are enabled | |||
# Select the new customer name in the 'Available Users' list box | |||
# Press the 'Add >>' button to move the new customer to the 'Users in Group' list box | |||
# Close the window by pressing the 'Ok' button | |||
# Show the list of filters (menu: View > Filters) | |||
# Select a filter for a customer, for example the filter: "Customer: ASML" | |||
# Right-click the filter in the list, and select the 'Duplicate Filter' option. | |||
# A new filter will now be created which has a ".1" prepended (in our example: "Customer: ASML.1". Open that filter by double-clicking it in the list. | |||
# Update the name of the filter to include the correct new customer name by changing the value in the 'Name:' field | |||
# Change the criteria of the filter, by double-clicking on the 'Found by is in list {...}' item | |||
# Deselect the old customer name in the list of shown customers, and select the new customer name in the list. Then press 'Ok' | |||
# Finalize the new filter by clicking on the 'Ok' button. | |||
From now on the customer is now in TestTrack and all filters are correctly updated. | |||
Revision as of 09:38, 18 June 2010
We are currently using TestTrack Pro Version 2010.1.0. You can download the correct client software to access the database from here
| Note: | Installing a newer or an older version then the version running on the server will not work. You will get a warning message, when the version of the client and server software do not match. |
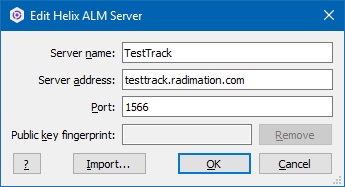
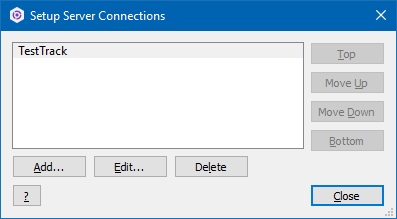
After installing use the following configuration to contact the database server:
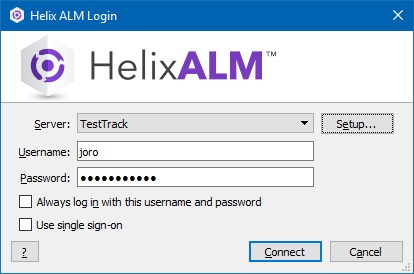
Then use your own log in information to connect to the database
Adding a customer
The following steps can be used to add a new customer to the list of known customers in TestTrack
- Start TestTrack
- Show the list of customers (menu: View > Customers)
- Press the 'Add...' button
- Specify the company name in the 'Last Name:' field
- Select the 'Address' tab
- Specify the company name in the 'Company:' field
- Any additional field can also be specified on the 'Address' tab
- Press the 'Close' button, ensuring that the data will be saved (click 'yes')
- Show the list of security groups (menu: View > Security Groups)
- Open the security group that corresponds to the reseller of the customer, by double-clicking the group in the list.
- Ensure that the options 'Display Customers' and 'Display local' are enabled
- Select the new customer name in the 'Available Users' list box
- Press the 'Add >>' button to move the new customer to the 'Users in Group' list box
- Close the window by pressing the 'Ok' button
- Show the list of filters (menu: View > Filters)
- Select a filter for a customer, for example the filter: "Customer: ASML"
- Right-click the filter in the list, and select the 'Duplicate Filter' option.
- A new filter will now be created which has a ".1" prepended (in our example: "Customer: ASML.1". Open that filter by double-clicking it in the list.
- Update the name of the filter to include the correct new customer name by changing the value in the 'Name:' field
- Change the criteria of the filter, by double-clicking on the 'Found by is in list {...}' item
- Deselect the old customer name in the list of shown customers, and select the new customer name in the list. Then press 'Ok'
- Finalize the new filter by clicking on the 'Ok' button.
From now on the customer is now in TestTrack and all filters are correctly updated.


