RadiMation Application Note 130
Amplifier Control Window
In this application note we explain how the Amplifier Control Window can be configured and used in RadiMation®.
Overview
RadiMation®is able to remote control amplifiers, if the hardware supports it. In this document we will show you how to configure an Amplifier to be remote controlled with the 'Amplifier Control Window'. We will explain the use and purpose of this manner of remote controlling your amplifier. In addition we will provide some tips and tricks to deal with the advantages and disadvantage of the 'Amplifier Control'.
Amplifier device driver
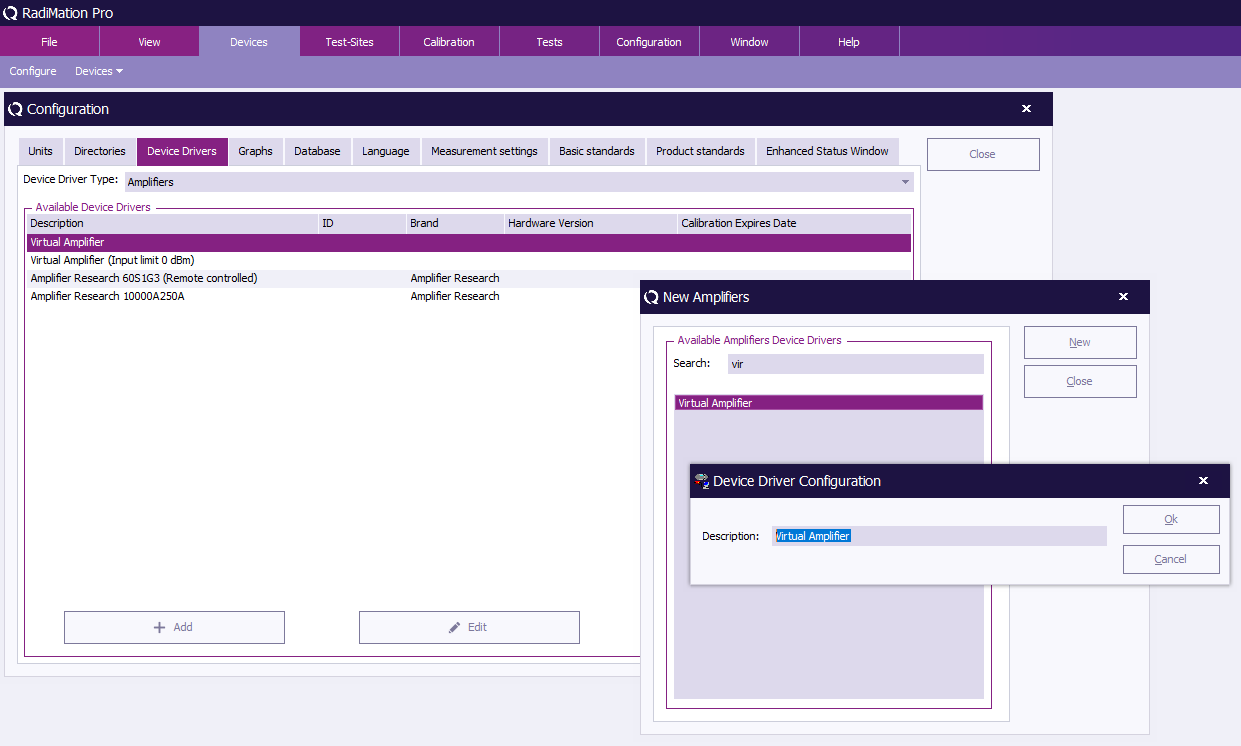
To make use of the Amplifer control function first step is to create a device driver for the Amplfier you want to be controlled. An existing amplifier driver is also fine, but the driver must be configured to remote control the device. You can create a new driver, as example a virtual one:
- From the main menu go to:
-
 Configuration
-
 Configuration
-
 Device Drivers
-
-
-
- Select 'Amplifiers' from the dropdown list.
- Click in the bottom on the 'Add' button on the left. A new window will be shown.
- Search for 'Virtual Amplifier'.
- Select the 'Virtual Amplifier' and click the 'New' button. A new window will be shown.
- Then click on the 'Ok' button. The windows will be closed and the configuration window of this new driver will be shown.
Title
text
