LUMILOOP LS Probe 2.0+
The LUMILOOP LS Probe 2.0+ device driver is a Field Sensor which is supported by RadiMation®.
Configuration[edit]
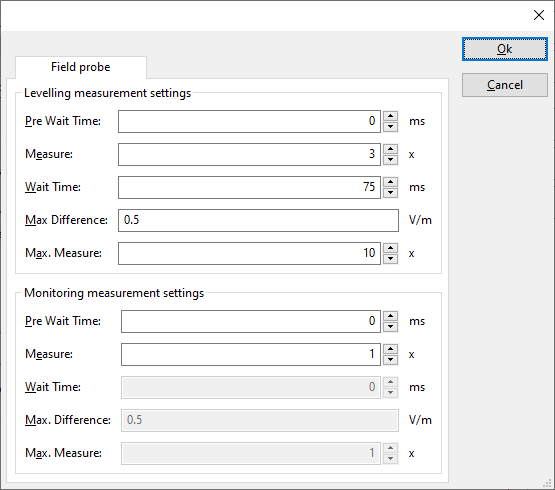
The following tabs are available in the advanced configuration of the LUMILOOP LS Probe 2.0+:
| Wait time before starting the measurement-loop. Can be used to wait for a signal generator, and or amplifier to stabilize. |
| The minimum amount of measurements in the measure loop. Continues to loop even if field strength level is stable. |
| The wait time between each measurement is taken, during the measurement-loop. |
| If the measured field strength between each measurement in the measurement-loop, is less than this value. The measured field strength is stable. The measurement-loop will then stop. |
| The maximum amount of measure times, for the measurement-loop |
According to these settings, RadiMation® will perform a minimum of 3 field strength measurements with a wait time between the measurements of 75ms. If all those 3 measurements are within 0.5 V/m, the field strength measurement is assumed to be stable, and RadiMation® will continue to average of the last 3 measurements. If the difference between the measurements is larger than the specified 0.5 V/m, an additional field strength measurement will be performed, and the last 3 samples will be compared to the 0.5 V/m difference again. At most 10 measurements will be performed if the difference between the 3 samples will not be within the specified 0.5 V/m.
Both for the leveling, and the monitoring these settings can be set individually. The leveling is used, whenever RadiMation® is measuring the field strength, to regulate the signal generator. If the field sensor is only used as input, without regulating on it, then the monitoring settings are used.
More detailed information on how to achieve a fast and stable field strength measurement are available in Application Note 106: Powermeter parameter configuration.
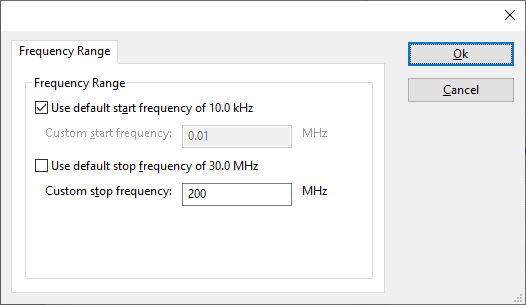
The frequency range of the LUMILOOP LS Probe 2.0+ as provided by the manufacturer is shown and selected as default. It is possible to overrule these frequencies and to manual adjust the allowed frequency range of the LUMILOOP LS Probe 2.0+.
| If the checkbox is checked, the default start frequency will be used as the lowest usable frequency in a test for this device. |
| If the Use default start frequency checkbox is unchecked, another start frequency (expressed in MHz) can be specified. The customized start frequency will then be used as the lowest usable frequency in a test for this device. The customized frequency can be a limitation or an extension of the default start frequency. |
| If the checkbox is checked, the default stop frequency will be used as the highest usable frequency in a test for this device. |
| If the Use default stop frequency checkbox is unchecked, another stop frequency (expressed in MHz) can be specified. The customized stop frequency will then be used as the highest usable frequency in a test for this device. The customized frequency can be a limitation or an extension of the default stop frequency. |
Specifying a different frequency range can be useful if for example:
- A device (like a coupler, antenna, injection device, cable, etc...) is still useable (but out of specification) outside the standard suggested frequency range.
- An external mixer is used to measure an extended frequency range.
- An up- or down-convertor is used to shift the frequency range.
- A newer model of a device is present that has an extended frequency range, and still uses the same remote control commands.
Be careful changing these setting as RadiMation® is no longer able to verify if the LUMILOOP LS Probe 2.0+ is used outside frequency range that is specified by the manufacturer. This may result to serious damage of your measurement device.
Links
- Google search: LUMILOOP LS Probe 2.0+
- Google image search: LUMILOOP LS Probe 2.0+
| This information about an equipment is automatically generated from the list of supported device drivers from RadiMation. |
| If you need more information you can contact radimation-support@raditeq.com. |
Installation & Configuration[edit]
The software delivered with the lumiloop has to be installed, follow the installation instructions in the manual.
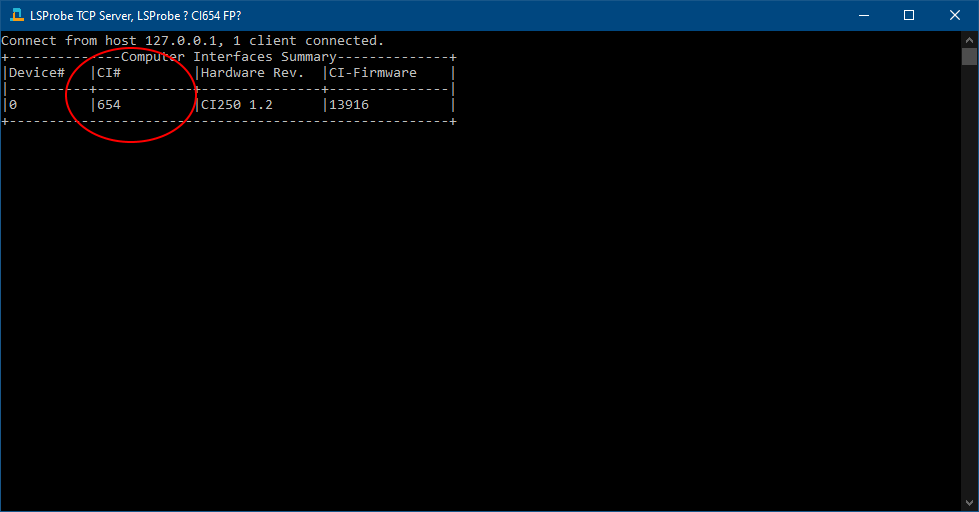
After the installation, first start the "LSProbe_TCP_Server", this will show the computer interface number (CI#).
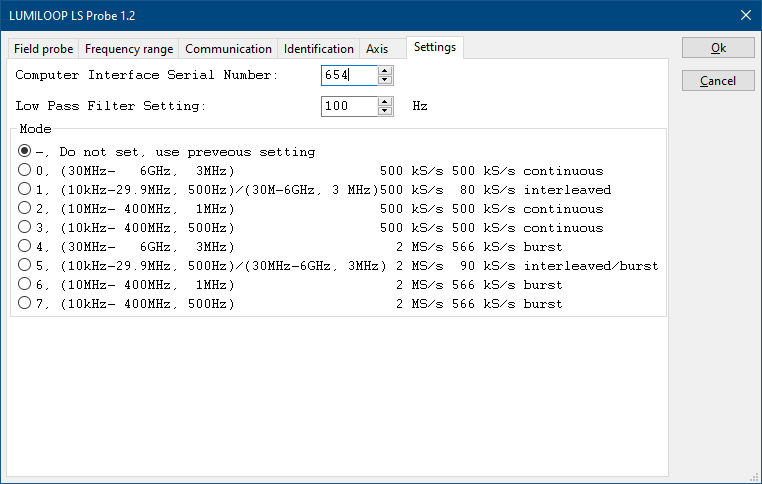
This computer interface number needs to be configured in the RadiMation driver.
After the configuration the Lumiloop GUI can be started, and the laser can be activated.


