Cable Calibration
Attenuation / Gain System Calibration[edit]
Before RadiMation® can start to determine the attenuation or gain of a system, the system need to be calibrated. Because this type of test considered to be a calibration all eut windows must be closed.
-
 Calibration
-
 System Calibration
-
 Attenuation / Gain
-
-
-
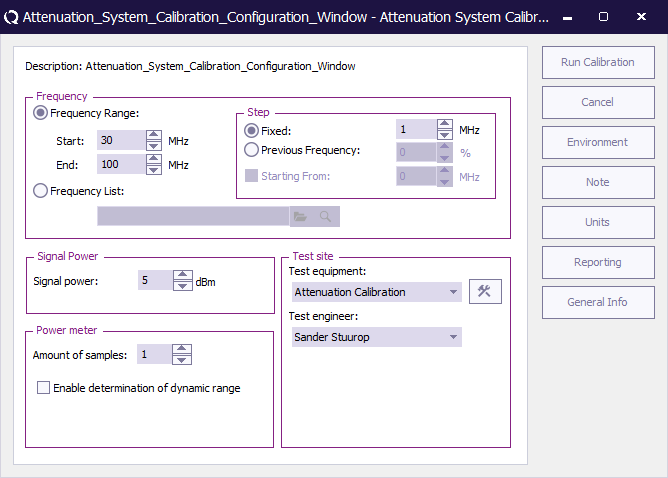
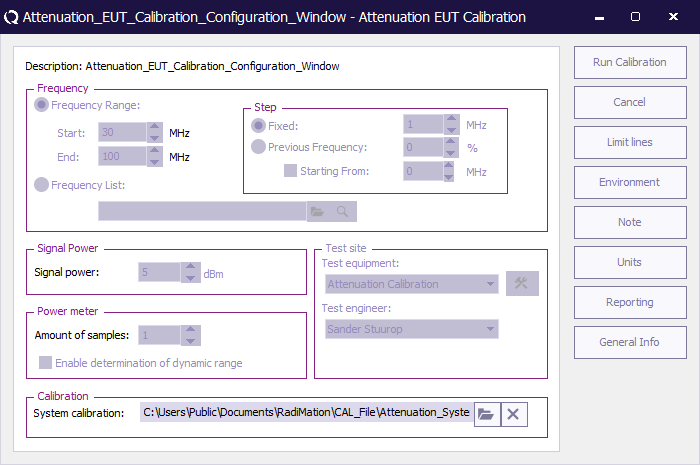
| Sets the frequency specification to a frequency range. |
| Sets start frequency. |
| Sets end frequency. |
| Sets a fixed step size from start to end frequency. |
| Sets a logarithmic step size from start to stop frequency |
| Sets the start frequency for a logarithmic step from which the actual measurement frequencies will be calculated. The starting from frequency should be lower than the actual start frequency. The test will start at the first calculated frequency that is equal to or higher than the specified start frequency. |
| With frequency list the operator can select a frequency list file by browsing to the file location. The frequencies inside the frequency list file will be measured. |
| The setting of the signal power level during the test. |
| The amount of samples level during the test. |
| In the test site window the test engineer can select which equipment list will be used during this test. |
| In the test engineer window, the test engineer can select its own name. The test engineer name will be stored by the test results. |
| By clicking on the equipment icon, the equipment list can be viewed and edited. |
| Start the configured calibration. |
| Cancel the configured calibration. |
| Display the environment window. |
| Display the note window. |
| Display the Units configuration window. |
Running the test[edit]
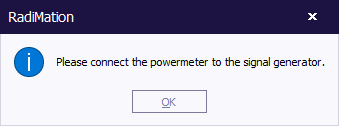
After the test initialization has been performed and passed the user will be prompt.
Connect the power sensor to the power reference and press ok. The power sensor will now be calibrated using the power reference source to make sure the power sensor is as accurate as possible.
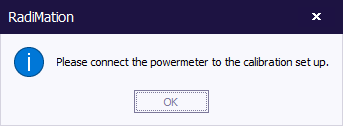
| Note: | Not all power sensors have a power reference source, in this case leave the power sensor connected to the calibration set up. |
Connect the power sensor to the calibration set up and press ok.
After the calibration has been completed the user will be prompt where the calibration file needs to be saved.
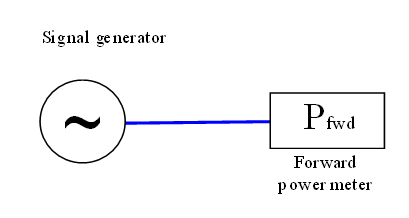
Test set up[edit]
| # | Device name | Tab in RadiMation® configuration window |
|---|---|---|
| Signal Generator | devices 1 | |
| Forward Power meter | devices 1 |
Attenuation / Gain Test[edit]
Because the determination of gain or attenuation is considered to be a test on an actual EUT, RadiMation® needs to have an EUT window open before this test can be performed.
-
 Calibration
-
 E.U.T. Calibration
-
 Attenuation / Gain
-
-
-
| Sets the frequency specification to a frequency range. |
| Sets start frequency. |
| Sets end frequency. |
| Sets a fixed step size from start to end frequency. |
| Sets a logarithmic step size from start to stop frequency |
| Sets the start frequency for a logarithmic step from which the actual measurement frequencies will be calculated. The starting from frequency should be lower than the actual start frequency. The test will start at the first calculated frequency that is equal to or higher than the specified start frequency. |
| With frequency list the operator can select a frequency list file by browsing to the file location. The frequencies inside the frequency list file will be measured. |
| The setting of the signal power level during the test. |
| The amount of samples level during the test |
| In the test site window the test engineer can select which equipment list will be used during this test. |
| In the test engineer window, the test engineer can select its own name. The test engineer name will be stored by the test results |
| Start the configured calibration. |
| Cancel the configured calibration |
| Display the environment window. |
| Display the note window. |
| Display the Units configuration window. |
The only selectable option is the calibration file, when another calibration file is selected the settings of this file will be displayed.
Connect the test set up and press Run Calibration.
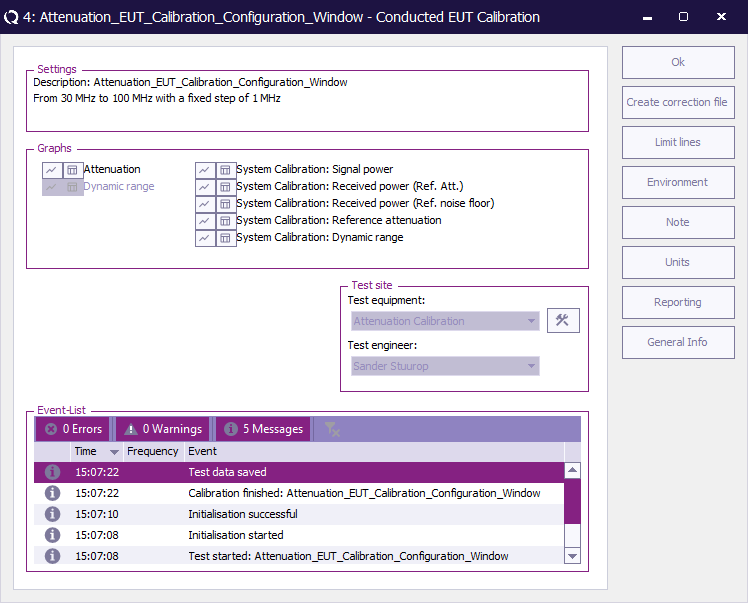
Once the actual test has been performed the test result file can be opened in the EUT window.
| Close the current window. |
| Create a correction file based on the test information. |
| Display the environment window. |
| Display the note window. |
| Display the Units configuration window. |
