RadiMation Application Note 125
Using Pontis PECOS[edit]
This application note is intended to make users aware of how to use the Pontis PECOS driver.
Supported features[edit]
support Pontis PECOS Version 5.1.0 Build 570
Supports connection over: LAN
Supports up to eight detectors
Supports detector types: Colour, Blink, Motion and OCR
Supports on screen display for the following measurement data:
- Netto power
- Forward power
- Reflected power
- Carrier level
- Field strength
- Frequency
Pontis PECOS AD Converter[edit]
How to set up the AD converter driver[edit]
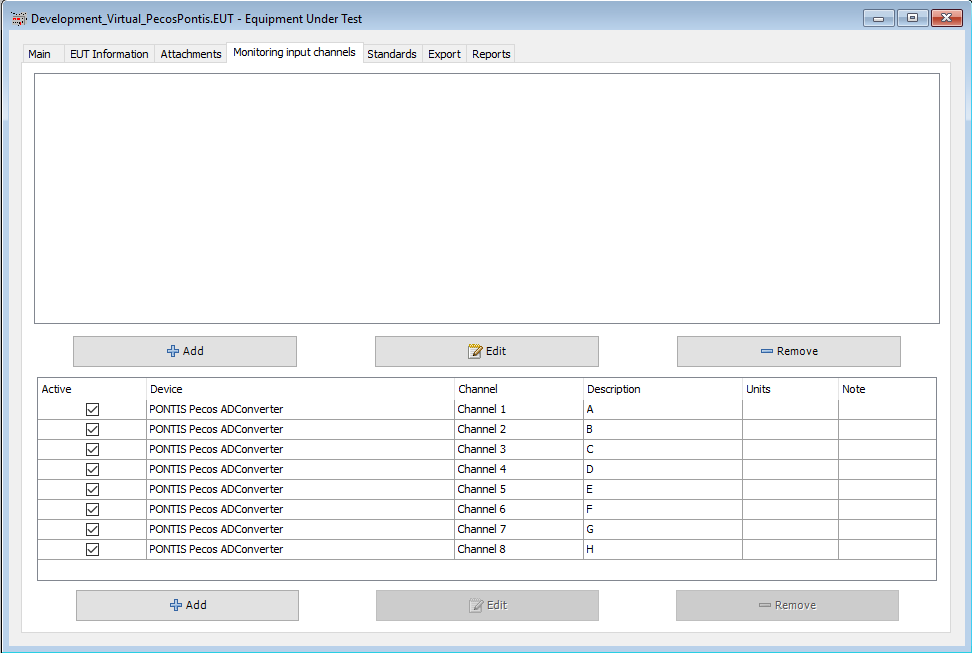
The PECOS AD converter driver must be configured In the monitoring input channels of the EUT window.
Communication[edit]
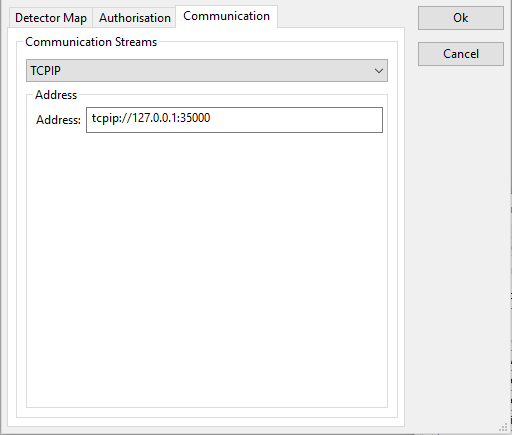
The ip-address and port of the machine which hosts the PECOS software must be configured in the communication tab of the advanced settings. This is seen on the image below.
Authorization[edit]
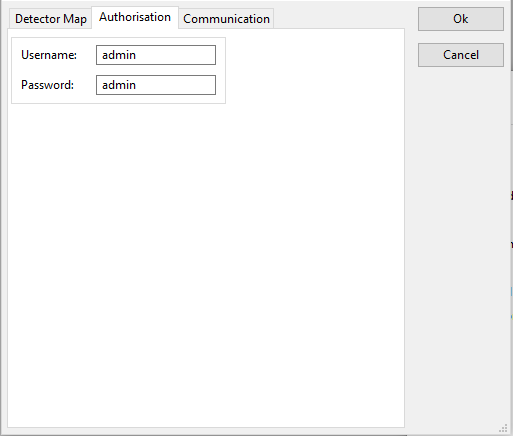
To log in to the PECOS software the user credentials for the PECOS software must be stored in the Authorisation tab of the advanced settings of the PECOS driver. This is seen on the image below.
Detector map panel[edit]
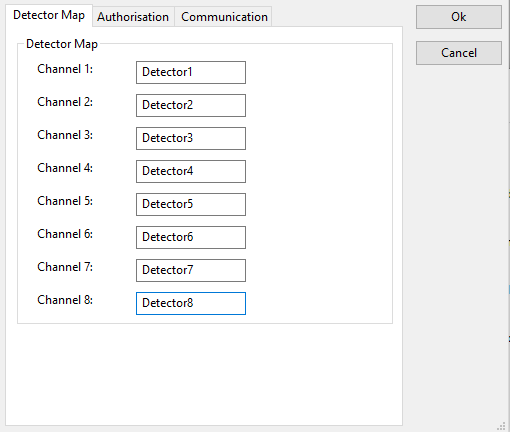
The caption of the detector as configured in the PECOS software must be stored in the advanced setting of the Pontis PECOS AD Converter driver. See image below for the location of these captions. For more information on how to configure detector events in the PECOS software see the Pontis PECOS manual
These settings will determine on which RadiMation AD channels the configured detectors shall be plotted. This is seen on the image below. Note: The values stored in these fields must exactly match the captions of the detectors.
Pontis PECOS EUT controller[edit]
How to set up the EUT controller driver[edit]
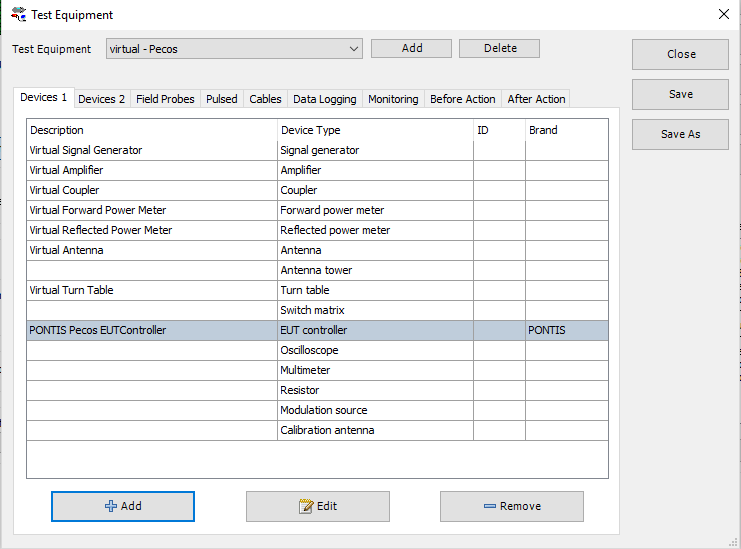
The PECOS EUT controller driver can be added to a new or already existing test site. This is done by opening the test site configuration and selecting the Pontis PECOS EUT controller for the EUT controller driver slot. See image below.
Communication[edit]
The ip-address and port of the machine which hosts the PECOS software must be configured in the communication tab of the advanced settings. This is seen on the image below.
Authorization[edit]
To log in to the Pontis PECOS software the user credentials for the PECOS software must be stored in the Authorisation tab of the advanced settings of the PECOS driver. This is seen on the image below.
Tags[edit]
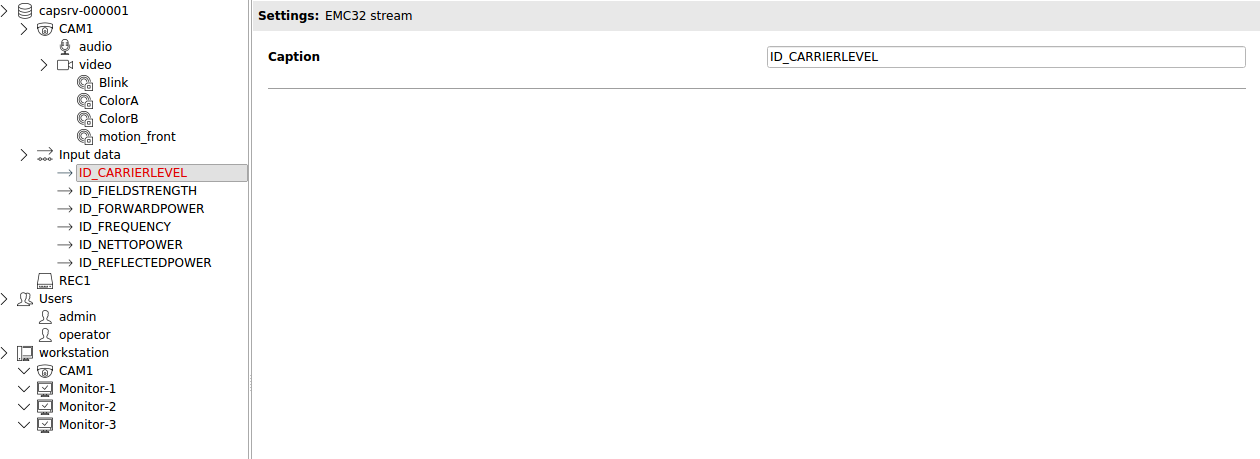
When using the on-screen display, specific captions must be configured in the Pontis PECOS software. RadiMation expects the following captions to be present:
- ID_NETTOPOWER -> To display the netto power in dBm
- ID_FORWARDPOWER -> To display the forward power in dBm
- ID_REFLECTEDPOWER -> To display the reflected power in dBm
- ID_CARRIERLEVEL -> To display the carrier level in dBm
- ID_FIELDSTRENGTH -> To display the field strength in V/m
- ID_FREQUENCY -> To display the frequency in MHz
These captions must be configured as is seen in the image below. Data written to the on-screen display shall be contained in one single data field. For more information on how to configure input-data-streams in the Pontis PECOS software see the Pontis PECOS manual.
Pontis PECOS Simulator[edit]
Setting up the PECOS simulator[edit]
1) Make sure virtual box is installed on your machine.
2) Locate the pecos 5.1 simulator on the network share.
(I:\Projects\RadiMation\Software\Documentation\Equipment\Audivo\5.1)
3) Import the PECOS-5-1.ova file in virtual box. (import new)
(I:\Projects\RadiMation\Software\Documentation\Equipment\Audivo\5.1\Win SDK)
4) Wait untill file is imported.
5) Start the imported virtual machine.
6) When during start-up prompted for a network controller select NAT.
Setting up the network connection to the simulator[edit]
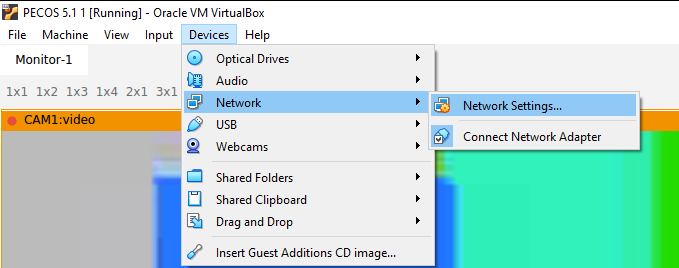
1) After starting the Pecos simulator go to Devices->Network->Network Settings.
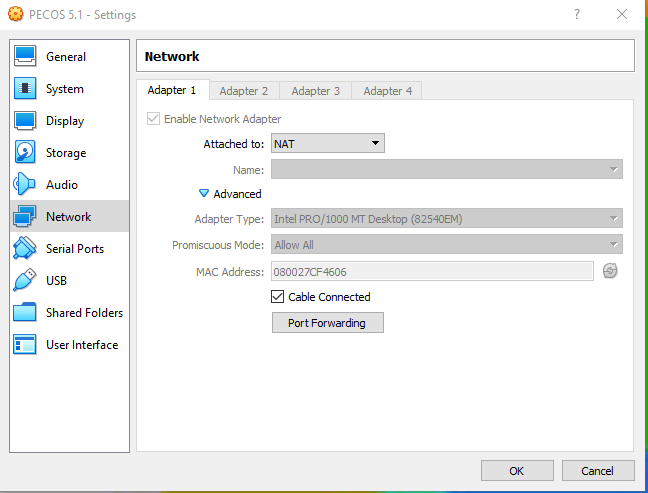
2) Make sure adapter 1 is set to the following configuration.
3) Add the following port forwarding rule. This way the simulator can be accessed by the host machine.
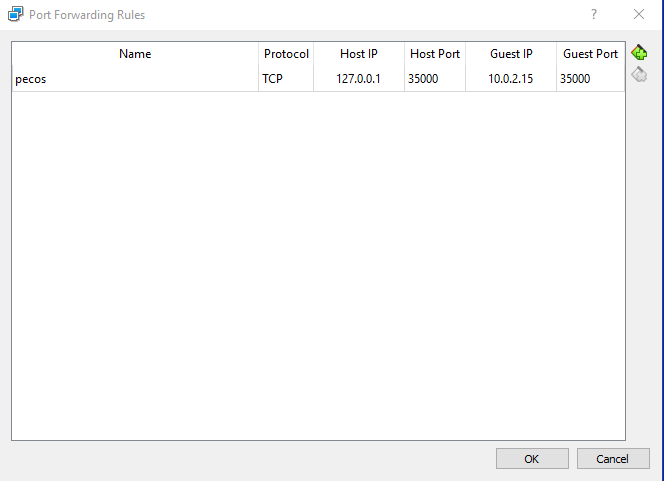
4) Verify if the simulator works by having RadiMation connect on 127.0.0.1::35000
How to activate the license file[edit]
1) Start the Pecos simulator.
2) Locate the license folder on the network share. (I:\Projects\RadiMation\Software\Documentation\Equipment\Audivo\5.1)
3) Copy the license folder to an usb-stick.
4) Open the running pecos simulator in virtual box.
5) Mount the usb stick in virtual box. Go to Devices->USB-> (select your USB stick).
6) In the pecos simulator go to setup license.
7) Now select the license file found on the mounted USB stick.
8) The pecos simulator should now restart after which the license is activated.
Errors[edit]
The following errors could be raised by the Pontis PECOS driver
EC_PONTIS_PECOS_AUTHORIZATION_FAILED: "Authorisation has failed. Please make sure the right credentials are used and try again.";
- When this error is encountered make sure the right login credentials are configured in the authorization tab of the advanced settings of the PECOS driver.
EC_DETECTOR_NOT_CONFIGURED: "Invalid Detector ID configured in Device driver. Please make sure that the configured ID matches the name of the Detector. Also make sure that the detector is enabled in the PECOS software.";
- Make sure that the captions of the detectors as configured in the PECOS software matches the captions in the Detector panel tab of the advanced settings of the PECOS AD converter driver. Also check if the detector is enabled in the PECOS software.
EC_TO_MANY_ADCHANNELS_SELECTED: "Too many AD Channels have been configured in RadiMation. Please make sure the number of AD channels matches the amount of detectors.";
- In the Monitoring input channels tab of the EUT window more AD channels have been configured than detectors are enabled in the PECOS software. If this is the case verify if all requested detectors are enabled in the PECOS software. If this checks out less AD channels must be configured since there are not enough detectors too match each AD channel.
EC_NotAllBytesRead:
- “Not al bytes have been read from the communication channel.”
This error is sometimes raised during the initialization of the PECOS ADConverter/EUT controller drivers. When this error is raised retry initializing the test.
