Difference between revisions of "Monitoring input channel setup"
(→Settings) |
|||
| Line 17: | Line 17: | ||
= Calculation = | = Calculation = | ||
| + | |||
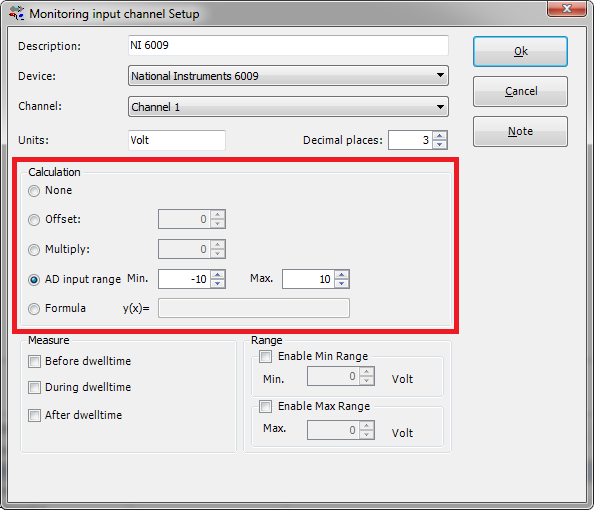
| + | [[Image:Monitoring input channel setup_calculation.png]] | ||
| + | |||
| + | {{ScreenElementDescription|None|No further calculations are performed by RadiMation to the value the <b>device driver<b> is returning. }} | ||
| + | {{ScreenElementDescription|Offset|RadiMation will apply an offset as entered by the end-user. | ||
= Measure = | = Measure = | ||
Revision as of 13:37, 16 October 2015
Monitoring input channel setup
Contents
General
The Monitoring input channel setup window can be opened by opening a new or existing EUT file:
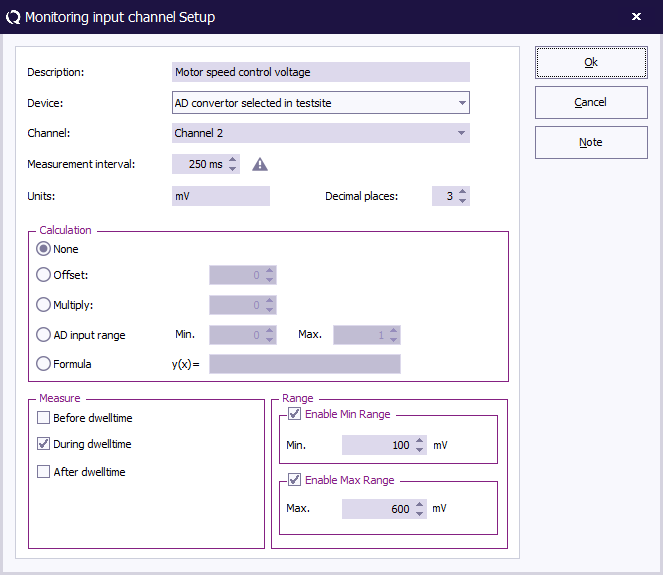
Then select the 'Monitoring input channels' panel. This window enables the end-user to configure the used AD-Converter during the test:
Settings
| Enter the description of the device. E.g. use the brand and/or identification number. |
| From the dropdown the used AD-Converter driver can be selected. |
| Enter the unit corresponding to the values which will be retrieved from the device. |
Calculation
| No further calculations are performed by RadiMation to the value the device driver is returning. |
{{ScreenElementDescription|Offset|RadiMation will apply an offset as entered by the end-user.

