Difference between revisions of "Configurable Amplifier"
(Updated DeviceDriverInfo template) |
|||
| Line 1: | Line 1: | ||
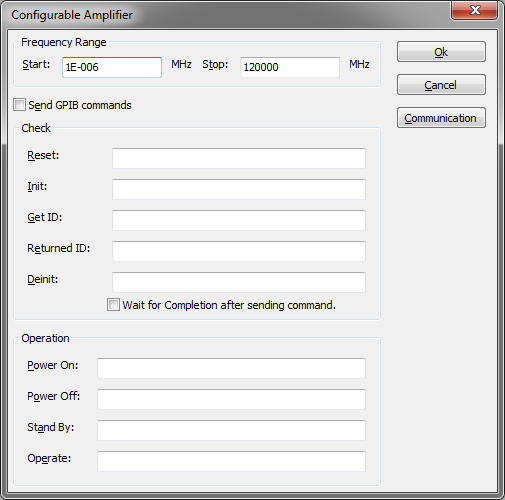
| − | [[Image:Screenshot configurable amplifier configuration window.png]] | + | {{DeviceDriverInfo |
| + | |DLLFile=RADEMPTY.DLL | ||
| + | |DeviceDriverName=CONFIGAM | ||
| + | |DeviceType=Configurable Amplifier | ||
| + | |SupportedDeviceTypes=2 | ||
| + | }}[[Image:Screenshot configurable amplifier configuration window.png]] | ||
{{FrequencyRangeConfigurableDevice|amplifier}} | {{FrequencyRangeConfigurableDevice|amplifier}} | ||
Revision as of 16:17, 17 February 2012
The Configurable Amplifier device driver is a Amplifier which is supported by RadiMation®.
Configuration
The following tabs are available in the advanced configuration of the Configurable Amplifier:
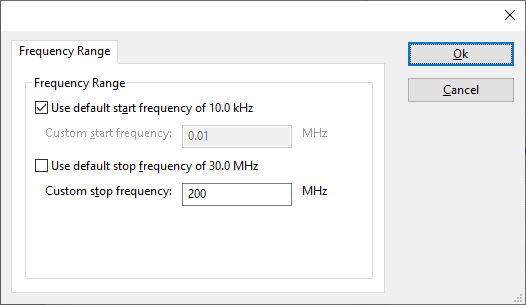
The frequency range of the Configurable Amplifier as provided by the manufacturer is shown and selected as default. It is possible to overrule these frequencies and to manual adjust the allowed frequency range of the Configurable Amplifier.
| If the checkbox is checked, the default start frequency will be used as the lowest usable frequency in a test for this device. |
| If the checkbox is checked, the default stop frequency will be used as the highest usable frequency in a test for this device. |
Specifying a different frequency range can be useful if for example:
- A device (like a coupler, antenna, injection device, cable, etc...) is still useable (but out of specification) outside the standard suggested frequency range.
- An external mixer is used to measure an extended frequency range.
- An up- or down-convertor is used to shift the frequency range.
- A newer model of a device is present that has an extended frequency range, and still uses the same remote control commands.
Be careful changing these setting as RadiMation® is no longer able to verify if the Configurable Amplifier is used outside frequency range that is specified by the manufacturer. This may result to serious damage of your measurement device.
Links
- Google search: Configurable Amplifier
- Google image search: Configurable Amplifier
| This information about an equipment is automatically generated from the list of supported device drivers from RadiMation. |
| If you need more information you can contact radimation-support@raditeq.com. |
Template:FrequencyRangeConfigurableDevice
|
Example
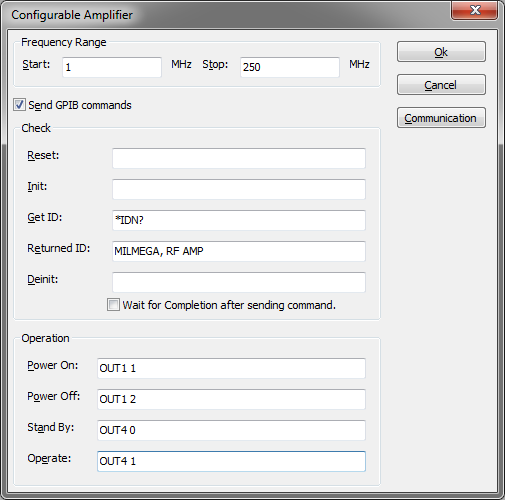
For this example the driver will be used to control the Milmega Controller AC-001.
Summary of control commands
| Description | Command | Parameters |
|---|---|---|
| Output logic | OUT1 | 0 = RF STANDBY
1 = RF ON |
| Output logic | OUT4 | 0 = LINE STANDBY
1 = LINE ON |


