Hidden Advanced Device Driver settings: Difference between revisions
No edit summary |
|||
| Line 43: | Line 43: | ||
{{Warning|Any change and/or modification to these advanced options, can result in unexpected results and/or incorrect measurement results. Changes in these advanced options should be verified and checked very carefully!}} | {{Warning|Any change and/or modification to these advanced options, can result in unexpected results and/or incorrect measurement results. Changes in these advanced options should be verified and checked very carefully!}} | ||
For a related information item see also: [[Editing a RDC File by pushing a button on the configuration screen]]. | |||
[[Category:RadiMation]] | [[Category:RadiMation]] | ||
Latest revision as of 15:11, 18 January 2016
Question
The RadiMation support department has asked me to changed a hidden Advanced device driver option. How can this be done?
Answer
Normally it is required to first perform the following steps:
- Close RadiMation®.
- Download and install the latest device drivers system from our wiki site: Device Drivers
- Start RadiMation®.
Otherwise, directly start with:
- Stop all tests and close all windows inside RadiMation®.
- Open from the main menu
-
 Configuration
-
 Configuration
-
 Select ‘Device Drivers’ tab
-
 Select ‘Device Driver Type’ from drop down
-
 Double click your device driver from the list
-
-
-
-
-
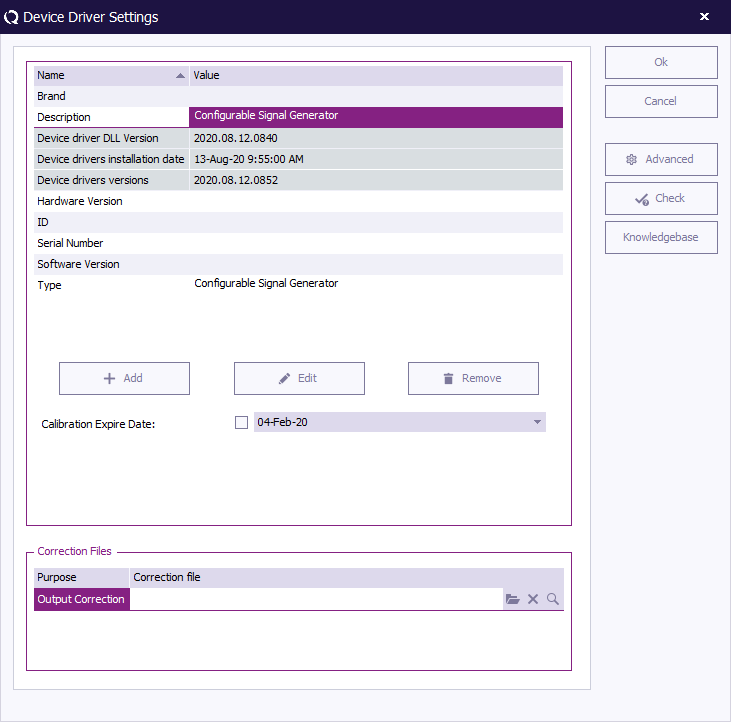
Now you will see the default “Device Driver Settings” window:
- To access the advance device driver options open the corresponding settings .INI file: Hold the "SHIFT" button from the keyboard while clicking the "Advanced" button. (It is also possible to manually search and open the corresponding settings .INI file on your disk.)
- Add or search the requested parameter(s).
- Add or modify the parameter(s) value as requested.
- Close the .INI file and click “Save” when asked to save changes.
- Press Ok on to close the “Device Driver Settings”.
- Press close to close the configuration window.
Example 1
Set the turn table to go to 90 decrease as starting point and stop point at 270. Turn table used is the 2090
[EMCO2090]
TurnAtStart=1
TurnToAtStart=90
TurnAtStop=1
TurnToAtStop=270
As you can see we have now modified the value of the parameter(s).
Example 2
Modify the frequency range of the Bonn BLWA 0820-160/75/50D. Change the Stop Frequency from the default 2GHz to 2.7GHz.
 [Frequencies]
 StartFrequency=1E+009
 StopFrequency=2.7E+009
As you can see we have now modified the value of the StopFrequency parameter.
| Warning: | Any change and/or modification to these advanced options, can result in unexpected results and/or incorrect measurement results. Changes in these advanced options should be verified and checked very carefully! |
For a related information item see also: Editing a RDC File by pushing a button on the configuration screen.
